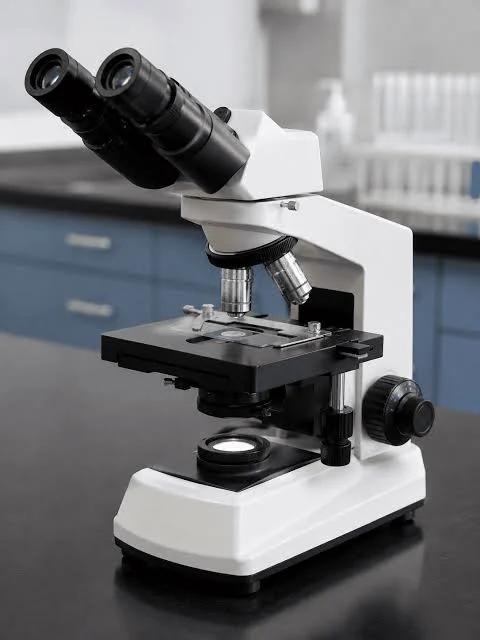
A Microscope SOP establishes standardized instructions for the operation, cleaning, and maintenance of microscopes used in pharmaceutical microbiology laboratories. It covers slide preparation, focusing techniques, objective lens selection, oil immersion microscopy, image capturing using PROVIEW software, and routine cleaning.
Following an approved microscope SOP helps maintain image clarity, ensure proper equipment handling, and support reliable microscopic examination and laboratory documentation.
SOP
1. PURPOSE:
To define the standardized instructions for the proper operation, cleaning, and maintenance of the microscope.
2. SCOPE:
This procedure applies to the operation, cleaning, and maintenance of the microscope used in the
Microbiology Laboratory.
3. RESPONSIBILITIES / ACCOUNTABILITY:
3.1 The Microbiologist shall be responsible for the operation and cleaning of the microscope.
3.2 The Microbiology Reviewer shall be responsible for reviewing the records.
3.3 The Head of the Department or designee shall be responsible for verifying and ensuring the
implementation of SOPs.
3.4 The Head of QA or designee shall be responsible for approving the SOP and overseeing its
implementation and compliance with the established procedure.
4. ABBREVIATIONS:
SOP ─ Standard Operating Procedure
QA ─ Quality Assurance
MB ─ Microbiology
5. DEFINITION:
A microscope is an instrument used to observe objects that cannot be seen clearly with the naked
eye. It magnifies the object’s image, enabling the examination of minute details.
6. PROCEDURE:
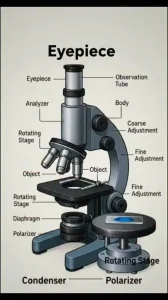
6.1 Image of Microscope and its different components:
6.2 General precautions:
6.2.1 Avoid handling optical surfaces, including lenses and glass components, with bare hands, as fingerprints, grease, and other contaminants may compromise image clarity and damage the optical surfaces.
6.3 Operation:
6.3.1 Switch ON the main power supply connected to the microscope.
6.3.2 Switch ON the microscope using the mains switch and regulate the illumination using the
brightness adjustment knob.
6.3.3 Place the prepared slide on the microscope stage and secure it using the slide holder. Use
the X/Y movement knobs to position the slide appropriately.
6.3.4 Rotate the revolving nosepiece to bring the 10X objective lens into the light path.
6.3.5 Adjust the coarse and fine focus knobs to bring the specimen into clear focus.
6.3.6 Adjust the interpupillary distance, diopter setting, and condenser centering to ensure proper
alignment of the optical axis and comfortable viewing.
6.3.7 Adjust the aperture diaphragm and field diaphragm to obtain optimal illumination and
image contrast.
6.3.8 Rotate the nosepiece to position the required objective lens in the light path and bring the
specimen into focus using the coarse and fine focus knobs.
6.3.9 Adjust the illumination intensity using the brightness adjustment knob to achieve optimal
visibility of the specimen.
6.3.10 Proceed with observing the specimen under the microscope.
6.3.11 Initially, focus the specimen using the 10X low-power objective lens, followed by the 40X
objective lens. Ensure that the image is clear and centered before proceeding to higher
magnification. Use the coarse and fine adjustment knobs as required to obtain a sharp
image.
6.3.12 Once the specimen is focused under low magnification, carefully lower the microscope
stage to provide sufficient clearance for applying immersion oil and to prevent damage to
the objective lens during the transition to oil immersion.
6.3.13 Place a small drop of immersion oil on the slide over the specimen area. Gently rotate the
revolving nosepiece to position the 100X oil immersion objective lens in contact with the
immersion oil.
6.3.14 Ensure that no air bubbles are present in the immersion oil, as they may adversely affect
image clarity and quality.
6.3.15 If air bubbles are observed, gently rotate the revolving nosepiece slightly to the right and
left to reposition the oil immersion objective and eliminate the bubbles.
6.3.16 Raise the stage to the appropriate focusing position and adjust the fine focus knob to obtain
a clear and sharp image of the specimen.
6.3.17 Connect the reflex camera to the PC and open the PROVIEW software to facilitate
enhanced observation and visualization of the specimen images.
6.3.18 Double-click on the PROVIEW software icon to launch the application.
6.3.19 Ensure that the camera is connected correctly and verify its presence in the camera list
section of the PROVIEW software.
6.3.20 Select the “Snap” option in the software interface to capture the required specimen image.
6.3.21 Save the captured image in JPG format to facilitate convenient storage and compatibility
with other applications.
6.3.22 Ensure that images of Gram-stained specimens are captured and saved in JPG format for
documentation and future reference.
6.4 Cleaning:
6.4.1 Clean the microscope using a lint-free cloth before and after each use to maintain
cleanliness and prevent contamination.
6.4.2 After use, clean the microscope lenses using suitable lens-cleaning tissue to remove any
residues and maintain optical clarity.
6.5 Maintenance:
6.5.1 Report any discrepancies observed during equipment operation to the supervisor or Section
Head and inform the Engineering Department or service engineer for necessary corrective
action. Affix an “UNDER MAINTENANCE” label to the equipment until the defect is
rectified.
7. ANNEXURES:
Annexure I: Template for the Microscope Usage Logbook Record
8. REFERENCES:
User manual
9. REVISION HISTORY:
Revision No. Effective date Reason for revision
00 New SOP
END OF DOCUMENT